Showing posts with label Home improvements. Show all posts

Friday, September 20, 2013

Our "adventure" themed nursery

We are officially ready to welcome baby brother into his room! 
I had WAY too much fun designing this nursery. 
These we're Sam's first shoes and I am so glad that we saved them.

These are images of some of the 7 wonders of the world. (Machu Pichu, the Pyramids, The Great Wall, Jesus in Rio and the Taj Mahal)

On the wall opposite of the crib is a map of the world. (No, it's not perfect but it was not easy painting this freehand! I am actually very happy with how it turned out. So don't be complaining about how giant Cuba is, please.) The hearts represent places where our family members were born, including our baby boy!

These little suitcases are perfect for holding blankets and toys. 
 I painted this canvas to look like "Paradise Falls" from the movie "UP" since it has a travel theme and is one of our favorite movies. 
The hot air balloons are made from construction paper and wire. I love how these turned out. (Thanks to Pinterest!)
 We are so happy that we have loads of hand-me-downs from big brother. Our amazing birthmother also sent us a box full of baby clothes so we are so prepared!
 Now, all we need is our little boy!

Monday, January 14, 2013

Flooring

Uh! Don't you just hate it when 2 dogs, a cat and an alligator pee on the carpet in your living room? 
Well we do. 

So we finally replaced our downstairs carpet with wood floors. 

It was a ton of work but so worth it. We went with a dark bamboo since it's the hardest material we could afford. It took us a few weeks but it's finally complete and we couldn't be happier with the result. (or the lack of urine smell!)


We have been updating a few of the other rooms as well. Our bedroom went from being cramped and all turquoise to a nice light brown and green room.
Then of course when Sam turned 3 we had to upgrade him to a new bed and layout in his "big boy" room. He requested a giraffe theme, and we agreed. 
 His room is so long and skinny that it was really difficult to find a way to fit all his things in there. We did what we could with the small space.


We have a ton more projects we are planning on tackling very soon. First to come is our entry way where we tore out a closet and some walls to install a nice stair banister. We also hope to add some much needed lighting and a new deck. Its nice having a handy husband around :)

Friday, April 06, 2012

Sam's "Giraffe room."

Sam saw an image on the computer months ago of a little girls room with a giraffe painted on the wall. Ever since then he has been asking for a "giraffe room for my house."

I like the kid a lot so I do what I can to make him happy.

I hand painted this giant giraffe on Sam's wall. He named her "Africa", and talks to her occasionally.
We want Sam to play in his room more so making more space to set up train tracks and read books was important in the design.
I still sit and read to Sam when I have the chance so the rocker had to stay.


I had other plans for these frames. I found an amazing photographer that took these seriously adorable pictures of baby animals. But they cost $20 a print and I had to say no to the idea. These silhouettes were made from images I found on Google. I touched them up in photoshop and, voila! Free art!


Sam loves the stars on his ceiling and we bought a really cool nightlight that projects the solar system over his bed.

I painted an area of his wall with magnetic paint, and then covered it with the original wall color. Sam really enjoys playing with the magnets that I spray painted to match the colors of his room.


His hermit crabs and book shelf.
So far, Sam has been spending a lot more time in his room. It's a nice change for all of us. He really enjoys all of the room and all of the giraffes!

To see how his room looked BEFORE the change, click HERE. It was hard to change the room that my BABY grew up in, but changes were needed.

Monday, January 16, 2012

Update #2 - Bathroom Mirror

What you need:

Floor boards - Size and color up to you. I chose to use a wider cut since my mirror was so big.
Liquid Nails - Look for the one that says "Mirror" on it.
Gun - for Liquid Nails and Caulking
Caulk
Painters tape
Paint

Before.

(Tips before you start: Get out of work clothes. Hubby luckily didn't ruin any of his nice digs, but I got paint and caulk on my shirt and pants before the project was through. Good thing I wore scrubs! Don't worry fans, I didn't mess up my Beatles shirt.)
Steps we used to frame our mirror:

1. Measure mirror and cut floor boards at 45 degrees. My Home Depot has a "Cut it Yourself" station with a miter saw and board.

2. Line back of frame (start with the bottom piece) and place onto mirror using tape to hold it in place. Board may be a little warped so do your best to tape it as close to the mirror as possible. Wait about 15-20 minutes for glue to set.
3. Place side pieces gluing the backs and the corners of boards so that it attaches to the mirror and the bottom board. Tape in place.

4. Wait about 20 minutes for glue to set and then finish gluing the frame together by adding the top piece. Tape in place.

5. Let glue set for at least 1 hour. Check often if boards have shifted or become unglued. Use tape to fix any issues.

6. Caulk corners and cracks between mirror. Let dry.
7. Let glue and caulk set and dry. We waited over night before removing the tape.

8. Remove tape and paint frame. The paint I chose was an indoor/outdoor paint to keep it from peeling or cracking in the humidity of the bathroom.
9. Admire!!

After

Thursday, June 16, 2011

Update #1 - Kitchen Backsplash

As much as it stinks to have Matt out of work, its been nice to have him around the house to help with a few projects we have been wanting to tackle.

 
First up, the kitchen. It was boring and very yellow. What to do....?

 
I managed to work out a deal with a tile company and put everything together to place a back splash behind our oven. After choosing tile and grout color and watching a few youtube videos, I was ready.

 
Materials and tools needed:
Tile, grout (non-sanded for glass tile), back splash double sided tape, glass cutter, trow, sponge, cheesecloth and grout sealer.

 
Here is the kitchen at the start. If you look closely you can see that I have started putting up some of the double sided tape. This product is much easier to use than grouting the tile to your wall.

 Next step is to place tile mosaics onto tape taking extra precaution that it is all level and spaced evenly. Leave area empty around the outlets, and cut single tile pieces to fit. Put outlet cover on after tile has been placed. The cover should sit on top of tile.


Grout tile. Use trow to even out material then sponge off excess. After grout has dried, use cheesecloth to "sand" off dust. I recommend using a grout that is either close to the tile color or darker. We were brave and decided to go with a tan color, but because its such a contrast, it kind of highlights our mistakes.


 The tile sealer that we used recommended waiting 30 days to seal grout. Make sure to follow instructions on the product that you use.

A few hours of cleaning up tile and grout mess and viola! Instant kitchen improvement!


 This project was super easy and makes such a big difference in the kitchen. Overall it took us about 5 hours (a lot of dry time) and approx $200 for our 17sq feet of space. (We used grout that was left here when our house was built, so that was not an expense for us.) The tile can be pricey so search around for the best deal.

Thursday, June 02, 2011

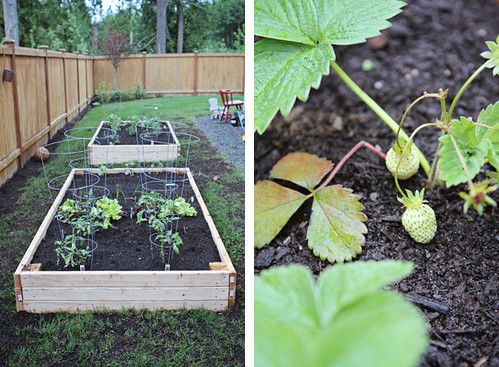
The side yard

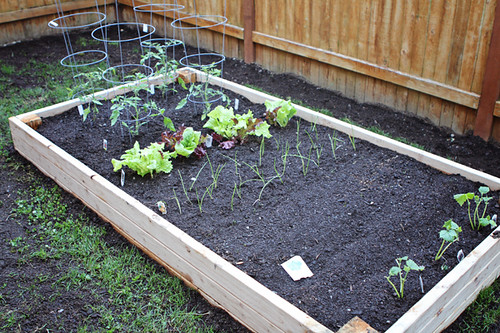
I pretty much get whatever I want. So it should be no surprise to me that Matt was more than willing to build me the garden beds and the chicken coop that I asked for.

Still, I am super excited about these almost finished products.

Our side yard has been a wasted space up until last week.
Out of sight, out of mind.

But now I have a fun garden to care for and I will have even more responsibility when the "Chick-Inn" is completed.  
two2\
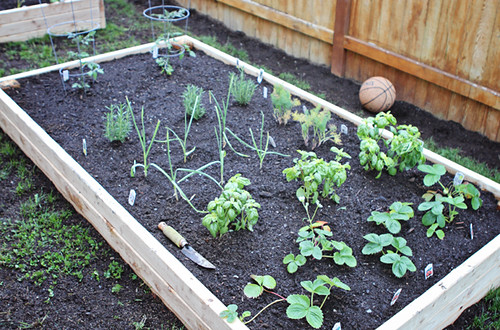
We planted all of the things that we most eat/use most around our home. Tomatoes (2 different varieties), lettuce, spinach, string beans, garlic, onions, cucumbers, dill, strawberries, basil, rosemary, broccoli and carrots. (Blueberry bushes will be added this week as well. ) Its so exciting to go out there every day and see how mature it is becoming.
Jaxon 436
Jaxon 435
There are still a few more projects to tackle in regards to the garden (stain the outside wood and add some slug-b-gone to the dirt mix) but I am loving any excuse these days to get outside. Rain or shine...even though its been mostly rain.

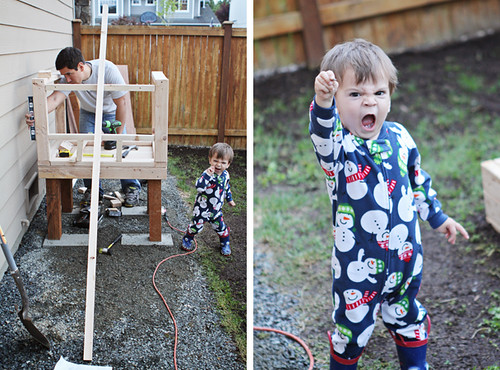
Yesterday, Matt started building the chicken coop. Did I mention that the girls are LIVING IN OUR BATHROOM?! Yes, its a disaster. Even though they are contained in a plastic tub, they are taking over. Not only are they huge, but they are curious birds with no fear. When I go in there to change their water or food, they immediately fly onto me to be able to stretch their wings a little. I love the attention, but I cant wait to introduce them to the outdoors, where they belong.

How white trash is this situation: Constructing A CHICKEN COOP with a toddler in CHRISTMAS PAJAMAS and hand-me down RAIN BOOTS in the recently thatched and seeded DIRT LAWN. Oh, and Sam is pretending that the broken screw he found is a gun. Sweet. Should I take a trip to Walmart in my flannels now?
two