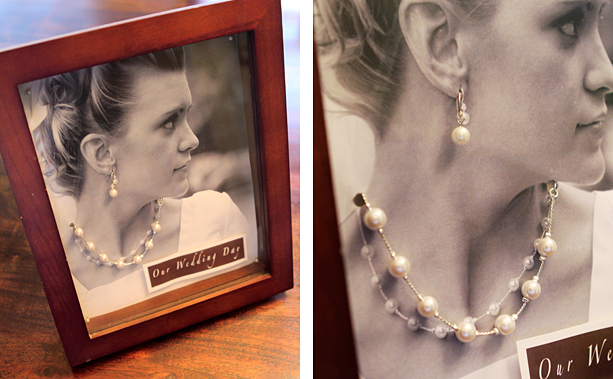
These glass door shadow boxes were found at a local craft store and are 8.5"X11" and 1.5" deep. I believe they were each about $15.
If using a boutonniere in your shadow box, dry it upside down for at least 30 days. This will give it a good "fresh" look.
After you have picked out the perfect picture (hopefully your photographer got a good shot of your neck and his chest) crop and cut the image to fit the back of your shadow box. The original picture that I used was a much bigger pic but I cropped it down so that the jewelry and boutonniere were closer to the same size.
If you are using your wedding necklace, puncture 2 holes near the neck and lace through the jewelry. Clip in the back and tape in place if needs be.
Now glue or pin the image in place and put jewelry and boutonniere in the desired location. I also added the earring that I wore by just poking it through the paper.
I pinned my husbands flowers to the shadow box, but I'm sure a glue gun would also do the job. I also included little print outs that give our wedding date. I used some hot glue behind those to make them stand out a little from the image.
Now, close the shadow box door and hang! Again, we get comments on these all the time. They are a great way to display pieces from your big day!
(Other wedding ideas: Cake cutting knife with image of cake in the back, dried flowers glued onto image of bouquet, bracelet placed around picture of your arm, etc.)


1 comment:
I love this idea, I am gonna steal it! SO much better than heirlooms sitting in boxes.
Post a Comment